vue实现用户登录验证(vue实现登录注册和验证码)
1. 技术栈说明
vue2.6 + vue-router + vuex + element-ui
2. 开始:新建项目
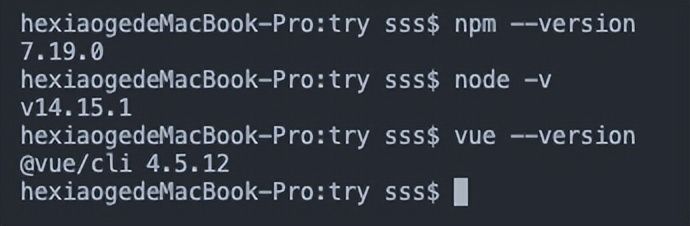
前提条件:在个人电脑上安装好nodejs(我的是14.15.1)之后,利用nodejs自带的npm包管理器安装好vue(我的是@vue/cli 4.5.12)
- 在命令行中通过以下指令在指定目录下安装脚手架vue-cli
npm install -g @vue/cli
- 使用vue的创建项目命令,vue create xxx (xxx是指项目名称)
- 选择项目所需要的插件
? Check the features needed for your project:
 ◉ Choose Vue version			// 选择vue版本
 ◉ Babel				// 支持babel
 ◯ TypeScript				// 支持使用 TypeScript 书写源码
 ◯ Progressive Web App (PWA) Support	// PWA 支持
 ◉ Router				// 支持 vue-router
 ◉ Vuex					// 支持 vuex
 ◯ CSS Pre-processors			// 支持 CSS 预处理器。
 ◉ Linter / Formatter			// 支持代码风格检查和格式化。
 ◯ Unit Testing				// 支持单元测试。
 ◯ E2E Testing				// 支持 E2E 测试。

 // 注意:你要集成什么就选就行了(注:空格键是选中与取消,A键是全选)
- 选择vue的版本,由于vue3目前只出来了8个月左右,受众面不广,所以选择vue 2.x版本


至此,项目搭建完成,可以cd打开项目,run起来了。
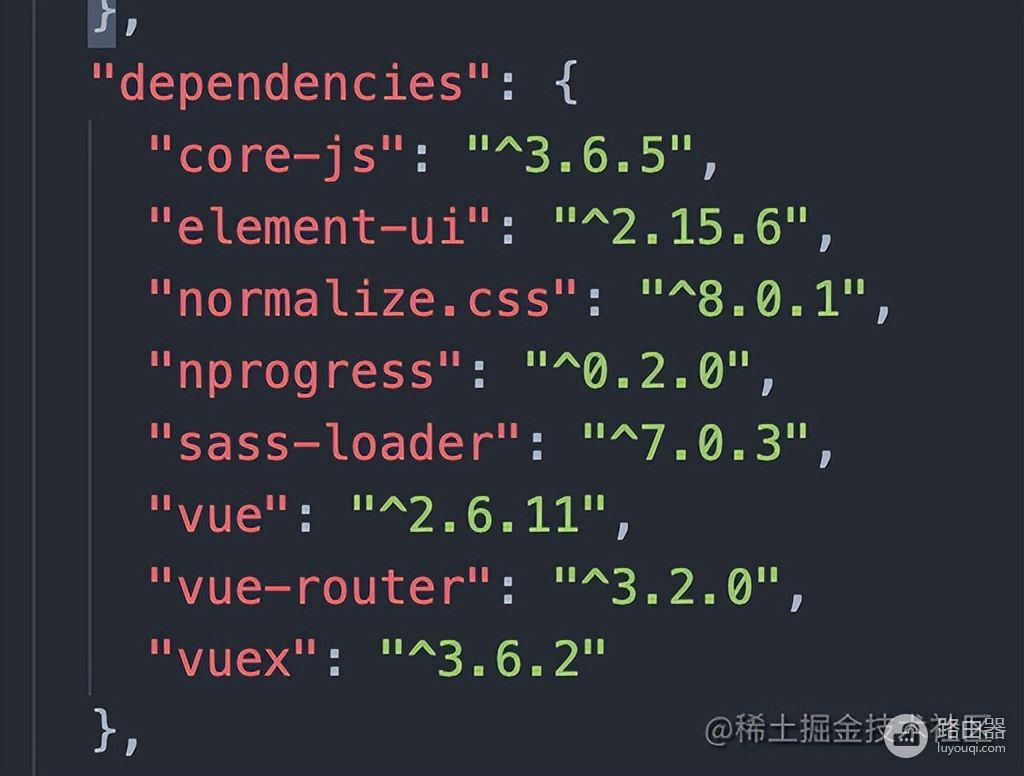
3. 添加element-ui以及nprogress和normalize.css和配置vue.config.js
- 先安装element-ui,nprogress和normalize.css
npm install element-ui nprogress normalize.css
由于element-ui使用到了sass-loader,所以这里也是需要安装的
npm install sass-loader
当前项目插件如下:
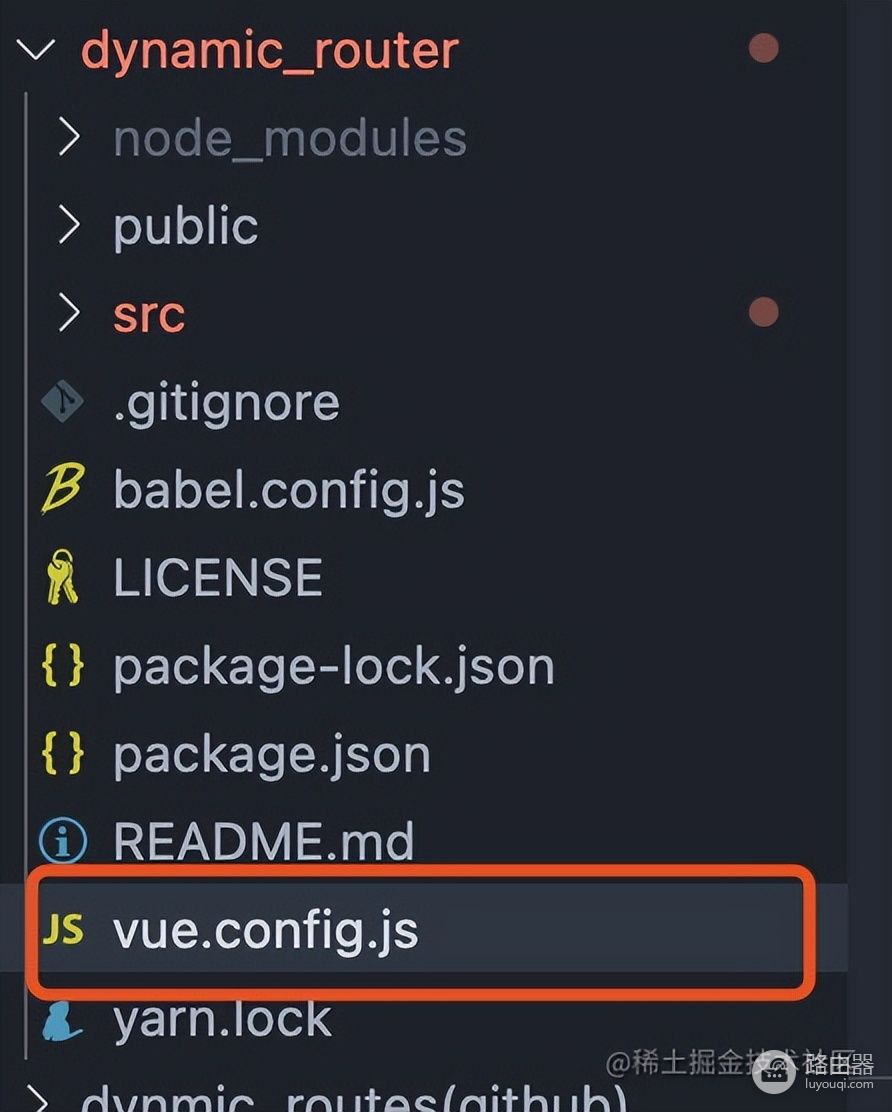
- 配置vue.config.js
vue.config.js 是一个可选的配置文件,如果项目的 (和 package.json 同级的) 根目录中存在这个文件,那么它会被 @vue/cli-service 自动加载。你也可以使用 package.json 中的 vue 字段,但是注意这种写法需要你严格遵照 JSON 的格式来写。
在根目录中创建 vue.config.js
官方配置vue.config.js的具体详解
'use strict'
const path = require('path')

function resolve(dir) {
  return path.join(__dirname, dir)
}

// All configuration item explanations can be find in https://cli.vuejs.org/config/
module.exports = {
  publicPath: '/',              // 部署应用包时的基本 URL,用法和 webpack 本身的 output.publicPath 一致
  outputDir: 'dist',            // 构建输出目录(打包位置)
  assetsDir: 'static',          // 放置生成的静态资源(js,css,img,fonts)的(相对于outputDir)的目录
  lintOnSave: false,            // 是否校验语法
  productionSourceMap: false,   // 如果你不需要生产环境的 source map,可以将其设置为 false 以加速生产环境构建
  devServer: {
    port: 8888,
    open: true,
  },
  configureWebpack: {           // 绝对路径
    resolve: {
      alias: {
        '@': resolve('src')
      }
    }
  }
}
3. 功能实现
先讲思路,让大伙有个大概的印象,不至于看代码云里雾里。
分以下几步走:
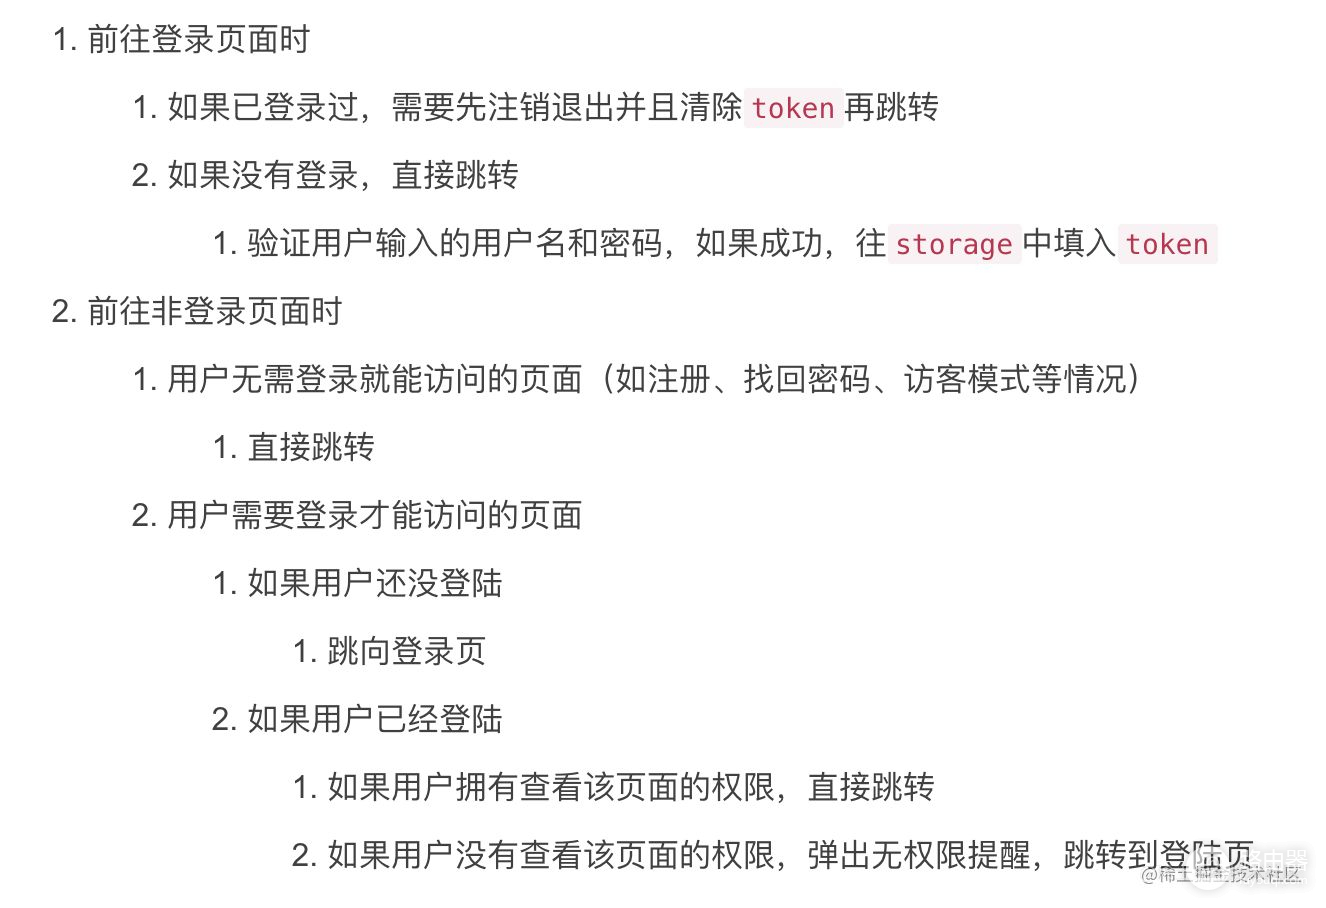
前端在本地写好路由表,以及每个路由对应的角色,也就是哪些角色可以看到这个菜单 / 路由。登录的时候,向后端请求得到登录用户的角色(管理者,普通用户)利用路由守卫者(router.beforeEach),根据取到的用户角色,跟本地的路由表进行对比,过滤出用户对应的路由,并利用路由进行菜单渲染
- 我们将储存在将storage中的token作为用户是否登录的标志,如果当前storage中有token,表明当前系统已被登录
- 将系统所有页面分为两类,需要登录才能查看的页面,不需要登录的login.vue, register.vue等
- 前端每次跳转路由时,做以下判断:
接下来从技术栈的角度补充几点:
- 在vue-router的beforeEach方法中实现以上逻辑,判断前端跳转去向;
- 出于教程考虑,不引入后端,用模拟数据的用户信息作为拦截axios发起的服务请求响应;
- 通过window.localStorage.setItem做userInfo的状态管理;
4. 实现
根据上述的步骤,我们进行每一个步骤的实现
1. 写好mock数据,用以模拟后端返回的数据源
dynamicUser里面就是模拟的后端数据,一般的后台数据库里面,就是分为一个user用户表,一个role权限路由表,这里不涉及后端,所以只给出最后后端输出的数据源。
一个完整的后端数据示例如下:
const dynamicUser = [
    {
        name: "管理员",
        avatar: "https://p3.toutiaoimg.com/img/user-avatar/ccb565eca95535ab2caac9f6129b8b7a~300x300.image",
        desc: "管理员 - admin",
        username: "admin",
        password: "654321",
        token: "rtVrM4PhiFK8PNopqWuSjsc1n02oKc3f",
        routes: [
            { id: 1, name: "/", path: "/", component: "Layout", redirect: "/index", hidden: false, children: [
                { name: "index", path: "/index", meta: { title: "index" }, component: "index/index" },
            ]},
            { id: 2, name: "/form", path: "/form", component: "Layout", redirect: "/form/index", hidden: false, children: [
                { name: "/form/index", path: "/form/index", meta: { title: "form" }, component: "form/index" }
            ]},
            { id: 3, name: "/example", path: "/example", component: "Layout", redirect: "/example/tree", meta: { title: "example" }, hidden: false, children: [
                { name: "/tree", path: "/example/tree", meta: { title: "tree" }, component: "tree/index" },
                { name: "/copy", path: "/example/copy", meta: { title: "copy" }, component: "tree/copy" }
            ] },
            { id: 4, name: "/table", path: "/table", component: "Layout", redirect: "/table/index", hidden: false, children: [
                { name: "/table/index", path: "/table/index", meta: { title: "table" }, component: "table/index" }
            ] },
            { id: 5, name: "/admin", path: "/admin", component: "Layout", redirect: "/admin/index", hidden: false, children: [
                { name: "/admin/index", path: "/admin/index", meta: { title: "admin" }, component: "admin/index" }
            ] },
            { id: 6, name: "/people", path: "/people", component: "Layout", redirect: "/people/index", hidden: false, children: [
                { name: "/people/index", path: "/people/index", meta: { title: "people" }, component: "people/index" }
            ] }
        ]
    },
    {
        name: "普通用户",
        avatar: "https://p3.toutiaoimg.com/img/user-avatar/6364348965908f03e6a2dd188816e927~300x300.image",
        desc: "普通用户 - people",
        username: "people",
        password: "123456",
        token: "4es8eyDwznXrCX3b3439EmTFnIkrBYWh",
        routes: [
            { id: 1, name: "/", path: "/", component: "Layout", redirect: "/index", hidden: false, children: [
                { name: "index", path: "/index", meta: { title: "index" }, component: "index/index" },
            ]},
            { id: 2, name: "/form", path: "/form", component: "Layout", redirect: "/form/index", hidden: false, children: [
                { name: "/form/index", path: "/form/index", meta: { title: "form" }, component: "form/index" }
            ]},
            { id: 3, name: "/example", path: "/example", component: "Layout", redirect: "/example/tree", meta: { title: "example" }, hidden: false, children: [
                { name: "/tree", path: "/example/tree", meta: { title: "tree" }, component: "tree/index" },
                { name: "/copy", path: "/example/copy", meta: { title: "copy" }, component: "tree/copy" }
            ] },
            { id: 4, name: "/table", path: "/table", component: "Layout", redirect: "/table/index", hidden: false, children: [
                { name: "/table/index", path: "/table/index", meta: { title: "table" }, component: "table/index" }
            ] },
            { id: 6, name: "/people", path: "/people", component: "Layout", redirect: "/people/index", hidden: false, children: [
                { name: "/people/index", path: "/people/index", meta: { title: "people" }, component: "people/index" }
            ] }
        ]
    }
]

export default dynamicUser
由此可以看出,一般登录后,返回的数据里,包含了一个用户的姓名,头像,简述以及token(username和password只是用以模拟登录用到的数据,在正常业务流中,后端不可能带出来的。),routes就是admin管理员和people普通用户的差异化动态路由了,admin多了一个admin的页面,而people是没有的。
其实这里是有多种思路的
有些开发者喜欢完整的静态路由都在前端里面,然后根据router的meta属性,写上对应user的role,登录的时候,再根据后端返回的权限,去过滤比对权限,把该用户角色所对应的路由处理好,渲染处理,这也是主流的一种处理方式。这种就等于是把所有的路由和权限业务处理都放在了前端,一旦上线发布后,想要修改就需要重新打包处理,而且不能经由后台动态新增删除
例如:
//代码位置:router/index.js
 {
    path: '',
    component: layout, //整体页面的布局(包含左侧菜单跟主内容区域)
    children: [{
      path: 'main',
      component: main,
      meta: {
        title: '首页', //菜单名称
        roles: ['user', 'admin'], //当前菜单哪些角色可以看到
      }
    }]
  }
还有一种解法,就是所有的路由权限等,都交给后端,后端根据前端的账号密码,去获取角色权限,处理路由,丢出就是已经匹配对应角色的路由了。这种写法前端运算量不会太大,而且易于修改和后期维护以及动态的增删改查,本文就是以该种形式实现。
2. 模拟用户登录,获取用户的权限和路由
- 在main.js里面,引入该页面,用于做路由守卫者
import Vue from "vue"
import App from "./App.vue"
import router from "./router"
import store from "./store"
import ElementUI from "element-ui"
import 'element-ui/lib/theme-chalk/index.css'
import "./router/router-config"  // 路由守卫,做动态路由的地方

Vue.config.productionTip = false
Vue.use(ElementUI)

new Vue({
  router,
  store,
  render: (h) => h(App),
}).$mount("#app")
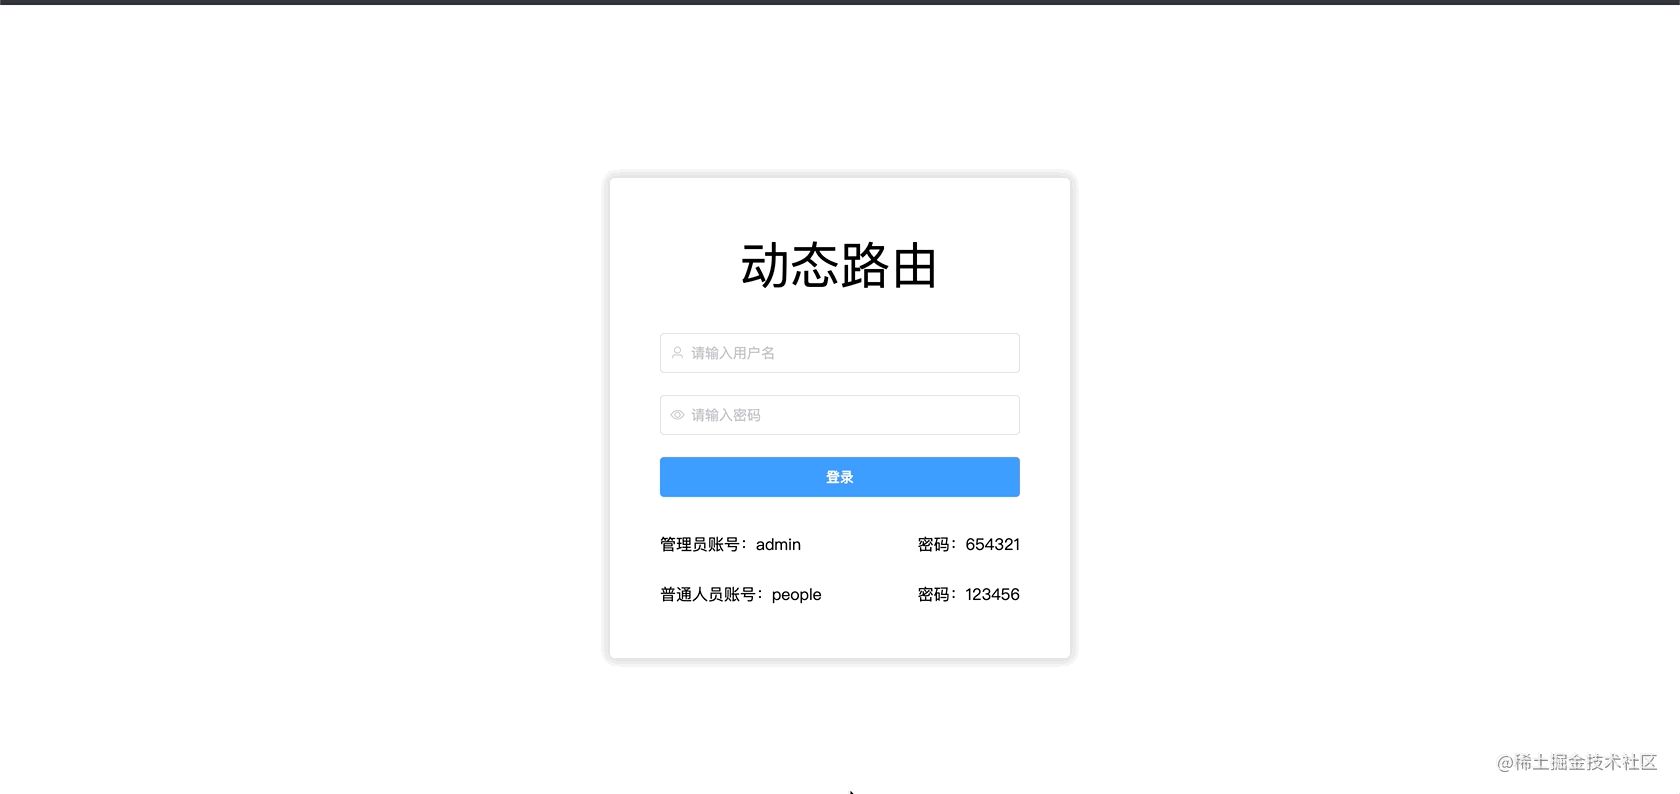
- 登录
本来我是写了mock数据,模拟用户登录,请求后端角色的接口,奈何mock挂了,
所以我就直接模拟了:
取到用户角色,存放进localStorage,然后跳转主页
- 在这里,由于用了element-ui的form表单提交,所以直接this.$refs.userForm.validate
element-ui的form表单提交文档!
- 这里的dynamicUser是mock的数据流,一般后端是直接直接返回对应的结果,可由于fastmock容易挂掉,所以就直接手写mock了。
定义flag用于做登录校验,如果循环都找不到对应的username和password的话,就告诉用户,该账号密码错误,登录失败..可如果有一次是成功的,那么flag就是为!0的,并且返回对应的用户信息,用户路由等。。最后还会进行路由的跳转初始化页面(首页),并进行动态路由加载和路由跳转。
import dynamicUser from "../../mock"
import { Message } from "element-ui"

login() {
    this.$refs.userForm.validate(( valid ) => {
        if(valid) {
            let flag = !1
            window.localStorage.removeItem("userInfo")
            dynamicUser.forEach(item => {
                if(item["username"] == this.user['username'] && item["password"] == this.user['password']) {
                    flag = !0
                    Message({ type: 'success', message: "登录成功", showClose: true, duration: 3000 })
                    window.localStorage.setItem("userInfo", JSON.stringify(item))
                    // 这里用catch捕获错误,而且不打印,解释在下方
                    this.$router.replace({ path: "/" }).catch(() => {})
                }
            })
            if(!flag) Message({ type: 'warning', message: "账号密码错误,请重试!", showClose: true, duration: 3000 })
        } else return false
    })
}
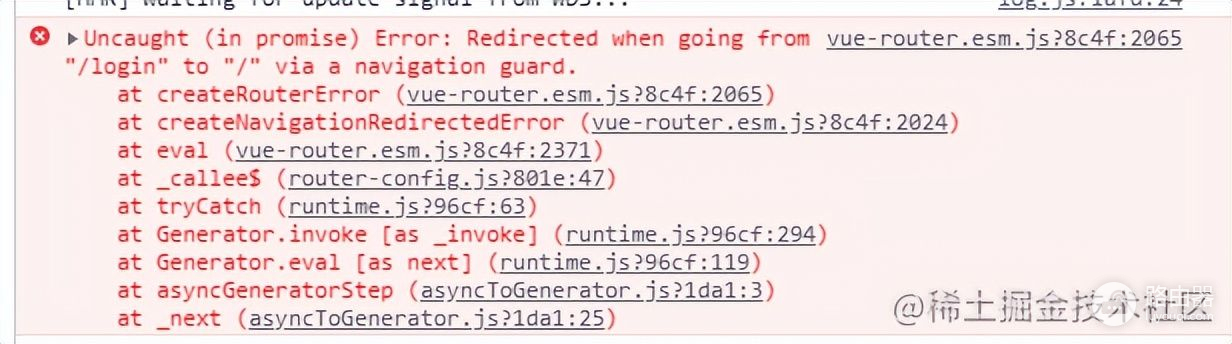
解释:如果不捕获catch错误,而且不打印的话,就会出现如图所示的错误。
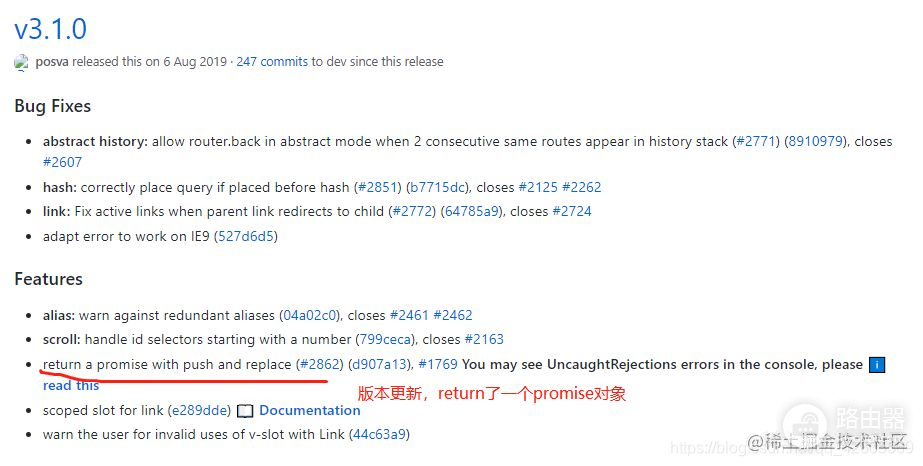
原因:vue-router路由版本更新产生的问题,导致路由跳转失败抛出该错误,但并不影响程序功能
- 解决方案1:
在使用编程式导航跳转时,每次使用,后面都跟上.catch方法,捕获错误信息this.$router.push("/xxx").catch(() => {})
- 解决方法2:
全局解决,替换路由的Push和replace方法,放在src/router/index.js中:
const originalPush = VueRouter.prototype.push
VueRouter.prototype.push = function push(location, onResolve, onReject) {
    if (onResolve || onReject) return originalPush.call(this, location, onResolve, onReject)
    return originalPush.call(this, location).catch(err => err)
}
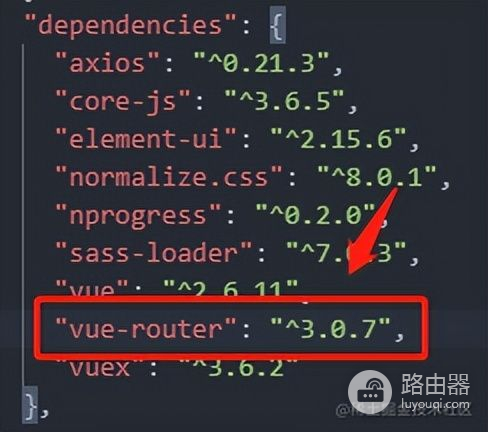
- 解决方案3:
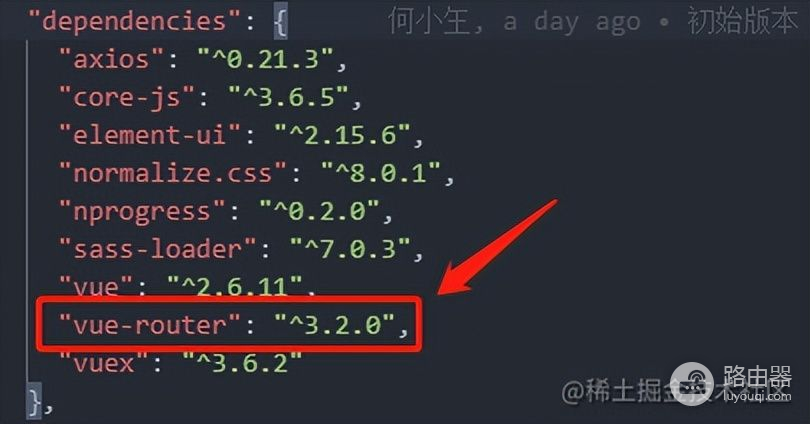
对vue-router的版本降低到3.0.7,手动修改,然后删除node_modules,改完再npm install
修改为:
3. (重点)路由守卫者拦截beforeach, 并动态渲染出路由表
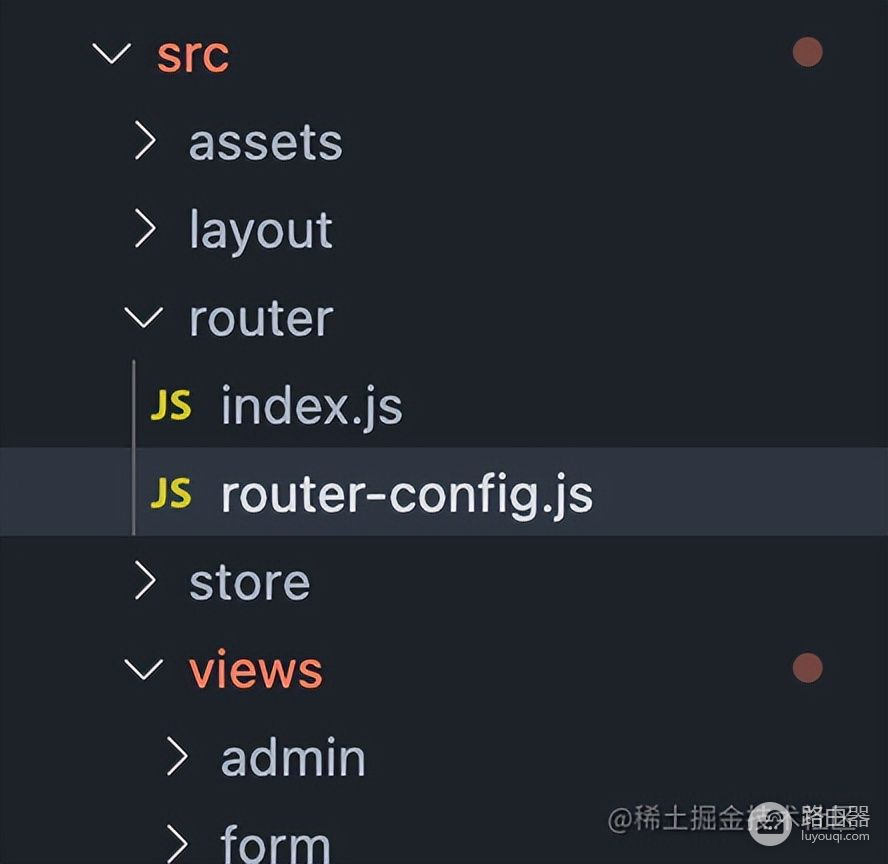
1. 在router文件夹下,创建router.config.js文件,用于做路由守卫者的拦截页面
2. 引入router,Layout,NProgress三个插件
- router说明
router是引用router/index.js里面导出的router
在router/index.js里面, router是new vue-router,相当于vue-router对象
- layout说明
这是页面的大体框架,具体页面详情如下
- NProgress是进度条插件
import router from "./index"
import Layout from "../layout/index"
import NProgress from 'nprogress' // progress bar
import 'nprogress/nprogress.css' // progress bar style
- 在router的beforeEach里面分别有三个参数to, form和next,分别对应着去哪儿,从哪儿来,下一步
- 根据去哪儿(to), 就需要判断路由指向是否需要过滤的路由地址数组里,如果在,则直接进入页面,无需判断,例如登录页面, 注册页面, 找回密码等(具体看业务需求)
const filterRoutes = ["/login"]
if (filterRoutes.indexOf(to.path) !== -1) {
    // 如果是无需权限的静态路由,可以直接跳走
    next()
    return false
}
- 然后就是进入动态路由主要部分了,首先判断当前路由栈的数量,如果路由栈的数量等于你在router/index.js里面的静态路由的数量,那么表明当前仍未加载动态路由,需要处理路由了,反之,则可以让它直接进入循环
// 由于我目前的教程里面,只是做了一个login的登录页面,所以静态页面也是仅有一个而已
if (router.options.routes.length == 1) {
      // 此处动态加载路由
} else next()    // 表明路由已加载,可直接进入页面
- 当路由未加载时,就需要获取登录时缓存的token和路由栈,由于刷新的时候,vuex的数据无法持久化,所以建议最好routes和token都放在缓存storage里面,当然,cookies里面也是可以的,可是这样的话,浏览器一旦关闭,那么下次打开就需要重新登录了。
// 获取token和原始路由数组
// 这里需要做空值合并操作,防止路由存在时,可token已失效,然后JSON.parse转义失败的情况导致的报错
const userInfo = JSON.parse(window.localStorage.getItem("userInfo")) ?? ""

// 当token和原始路由都存在的时候
// 进入路由执行路由过滤和跳转封装函数
// 否则,跳回登录页面
if(userInfo.token && userInfo.routes) onFilterRoutes(to, next, userInfo.routes)
else next({ path: "/login", replace: true })
Tips小知识
空值合并操作符( ?? )
只有当左侧为null和undefined时,才会返回右侧的数
空值合并操作符(??)是一个逻辑操作符,当左侧的操作数为 null或者 undefined时,返回其右侧操作数,否则返回左侧操作数。
- 当进入路由过滤和跳转封装的时候
- 先执行异步请求,确保路由过滤和路径补全已完成。先把routes传入递归函数(filterASyncRoutes),用于做路径的补全和Layout的判断并赋值,并且当routes存在children(子级路由)的时候,路由需要再次回调递归函数(filterASyncRoutes),最后并把处理好的路由栈,返回给路由过滤函数
- 根据异步请求返回的routes,进行路由的排序,毕竟当用户动态处理了路由后,展示出来的顺序跟处理时的顺序不一致,那就不太好了。
- 路由都处理完成后,把路由循环,并动态添加进router.options.routes里面,而且路由router里面,要使用addRoute(item),把路由一点点添加进路由表里。
- 最后执行路由跳转,跳回当前需要跳转的页面
// 路由拼接
function loadView(view) {
    return () => import(`@/views/${ view }`)
}

// 路由过滤和跳转
async function onFilterRoutes(to, next, e) {
    const routes = await filterASyncRoutes(e)    // 路由过滤
    routes.sort((a, b) => a['id'] - b['id'])
    routes.forEach(item => {
        router.options.routes.push(item)
        router.addRoute(item)
    })
    next({ ...to, replace: true })
}

// 路由过滤   遍历路由 转换为组件对象和路径
function filterASyncRoutes(data) {
    const routes = data.filter(item => {
        if(item["component"] === "Layout") item.component = Layout
        else item["component"] = loadView(item["component"])
        // 路由递归,转换组件对象和路径
        if(item["children"] && item["children"].length > 0) item["children"] = filterASyncRoutes(item.children)
        return true
    })
    return routes
}
tips:
- 为什么使用router.addroute,而不使用router.addRoutes
新版本router.addRoutes已废弃:使用 router.addRoute() 代替。
官方的解释是 router.addRoute 接受的是一个路由规则,也就是一个对象,或者接受一个字符串和一个对象。
- 为什么要使用() => import(@/views/${ view })来做路由拼接
懒加载:又叫延时加载,即在需要的时候进行加载,随用即载
【相关问题】import() webpack4懒加载使用变量报错解决:https://www.cnblogs.com/chenxi188/p/13662036.html
import和require的区别
node编程中最重要的思想就是模块化,import和require都是被模块化所使用。
遵循规范require 是 AMD规范引入方式import是es6的一个语法标准,如果要兼容浏览器的话必须转化成es5的语法调用时间require是运行时调用,所以require理论上可以运用在代码的任何地方import是编译时调用,所以必须放在文件开头本质require是赋值过程,其实require的结果就是对象、数字、字符串、函数等,再把require的结果赋值给某个变量import是解构过程,但是目前所有的引擎都还没有实现import,我们在node中使用babel支持ES6,也仅仅是将ES6转码为ES5再执行,import语法会被转码为require
项目&源码
源码地址(gitee):https://gitee.com/lemonote/vue2-dynamic-routing
项目地址:https://dynamic.lemonotes.cn/#/login
整体流程走完了,再容易让人蒙的地方
1. 根据路由进行菜单展示\
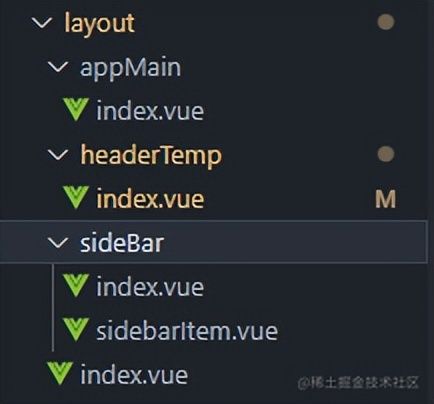
代码位置:/src/Layout/sideBar/sidebaritem.vue,
先看下elementUI菜单组件,把一些基础的参数先了解一下,
这里我把菜单渲染写成了一个组件:
用到了递归属性,保证可以生成多级菜单,
我建议不熟悉的,大家用组件先模拟着写一个包含跳转功能、icon展示的菜单,然后再看我写的组件
2. 用户退出系统
代码位置:/src/layout/headerTemp/index.vue
退出的时候,记得清除掉存在localStorage的用户角色,
然后利用this.$router.replace({ path: "/login" })跳转到登录页,
为什么要用location.reload(),这样会把之前addRoute的路由清除掉,确保下个用户登陆后,会重新渲染正确的菜单
// 退出登录
handleLogout(key) {
    if(key == "logout") {
        window.localStorage.removeItem("userInfo")
        Message({ type: 'success', message: "退出登录", showClose: true, duration: 3000 })
        this.$router.replace({ path: "/login" })
        location.reload()
    }
}
3. 为什么不用vuex
本来确实是打算用vuex来做路由的处理的,可是后来发现,当浏览器手动刷新或者被动刷新的时候,vuex无法做数据持久化,简而言之,就是vuex里面的state的值会被清空,所以为了稳妥起见,我是选择了缓存storage来处理路由问题。
如有不正确的地方,还望小伙伴指正哈
最后
公众号:小何成长,佛系更文,都是自己曾经踩过的坑或者是学到的东西
有兴趣的小伙伴欢迎关注我哦,我是:何小玍。大家一起进步鸭


